Using an air fryer is a great way to roast raw coffee beans because it allows you to complete the roasting process quickly and easily. In addition, you also don’t need to worry about filling your kitchen with smoke during the roasting process.
In this article, I’ll discuss a step-by-step method that’ll allow you to understand how to roast coffee beans in an air fryer.
How to Roast Coffee Beans in Air Fryer
If you’re a coffee lover and like to roast coffee beans yourself in an air fryer, use the following steps to complete the process easily.

Step 1: Preheat the Air Fryer
It’s important to preheat your air fryer if you want to roast your coffee beans evenly. It makes sure that the coffee beans start roasting as soon as you place them inside the fryer.
If you don’t preheat the air fryer, you won’t get the crispy coffee beans and they can also become stale or soggy. I recommend you set your device temperature to 350 to 450 degrees Fahrenheit.
Generally, it takes three to five minutes to preheat the air fryer. However, you can read the user’s manual of your device to determine the exact duration. Important Note: If your air fryer doesn’t come with the temperature marking, consider setting it too high and wait for three to five minutes.
Step 2: Place Coffee Beans Inside the Air Fryer
You’ll be able to place two to four cups of coffee beans inside the air fryer basket, depending on the model you have. Again, consult the user manual to make sure you don’t overload your device.
Keep in mind that you’ll need to arrange coffee beans in a single layer. Don’t try to pile them because it’ll hamper the ventilation and you’ll end up with unevenly-roasted and soggy beans.
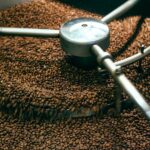
Step 3: Start the Roasting Process
Once you have placed your coffee beans inside, close the air fryer’s basket and start the roasting process. You’ll need to keep the temperature between 350 to 450 degrees Fahrenheit during the entire process to achieve ideal results.
The roasting time will depend on the level of roast you want. For example, you’ll need to keep the beans inside the air fryer for a longer time if you want a dark roast. Here’s how you can achieve different types of roasts.
Light Roast
Listen for the very first coffee bean to crack inside the fryer, if you want a light roast, like blonde espressos. The sound of the first crack will be very clear and easily audible. Ideally, you should hear the first crack sound within five to eight minutes, if you’ve set the temperature to 450 degrees Fahrenheit (or at high-temperature settings).
You might need to wait for 10 to 12 minutes if you’ve set the device to 350 to 400 degrees Fahrenheit. The first crack will indicate that your coffee beans are roasted lightly. So, make sure that you remove them from the basket if you want a light roast.
Medium Roast
You’ll need to wait for a couple of minutes after hearing the first crack if you want a medium roast. You don’t want to wait for too long as it’ll turn the coffee beans into a dark roast.
Usually, the first crack lasts for one to two minutes and the coffee beans change their color to maple brown after that. You won’t need to wait to hear the second crack if you want a medium roast.
So, open the air fryer’s basket and check the color of the coffee beans right after the first crack ends. If you see a maple brown color, remove your medium roasted coffee beans.
Dark Roast
You’ll need to wait for the second crack that starts about three to four minutes after the first one. Keep in mind that it won’t be as audible as the first crack.
So, the better strategy is to look for the color change after three to five minutes of hearing the first crack. If the coffee beans have turned dark brown, remove them from the air fryer. A great example of dark roast coffee is Italian roast coffee, with its slightly bitter and strong coffee taste.
Step 4: Let the Roast Lose Gas
You must let the roasted coffee beans degas after removing them from the air fryer. Some of the compounds present in the beans turn to carbon dioxide during the roasting process.
Removing your coffee beans from the fryer and storing them right away won’t allow them to degas and it can ruin the flavor of your brewed coffee.
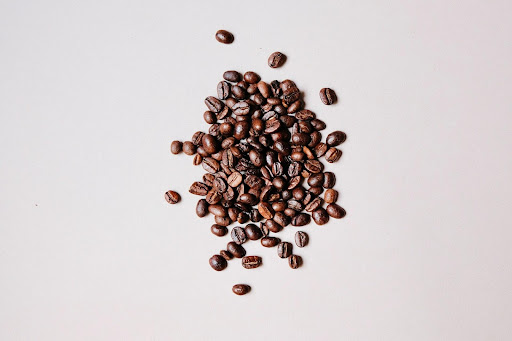
The process of degassing is very easy as you only need to place the roast in a single layer on a cold surface. The carbon dioxide gas will automatically diffuse as the coffee beans cool. Keep in mind that the coffee beans can take two to 10 days to degas completely, depending on the type of coffee beans you used.
So, place the coffee beans in a cool and dry spot using an open container once they have cooled down. Let them sit for at least 48 hours to help them lose most of the carbon dioxide before storing them in an airtight container.
Frequently Asked Questions
The following are the most common questions about roasting coffee beans in an air fryer.
How Do You Store Roasted Coffee Beans?
Use an airtight container to store your roasted and degassed coffee beans and place them in a dark, cool, and dry spot. Make sure that you store them in their unground form. Otherwise, they will lose their freshness and flavor quickly. There are also those who store their unopened coffee beans in the fridge to keep them fresh longer.
How Long Does It Take to Roast a Coffee Bean in an Air Fryer?
The time of roasting depends on the air fryer’s temperature that you have selected and the roast type you want. The light roast will be ready within five to eight minutes at 450 degrees Fahrenheit. The Medium roast will take eight to 10 minutes and the dark roast will be ready within 10 to 12 minutes at the same temperature.
Final Words
Roasting coffee beans in an air fryer is a quick and easy process. I hope this guide will help you understand the right way to roast your coffee beans in an air fryer effectively. Just make sure that you select the right temperature and remove the coffee beans at the right time from the fryer depending on the roast level you want.